Saturday, August 18, 2012

My Craft Channel Guest Blogger

Hey Crafty Friends-

I am so excited to be guest blogging for My Craft Channel today! For those that are new to my blog WELCOME. Glad to have you hop on by. For today's post I decided I am done with Summer and ready for Fall. Bring on sweaters, pumpkin pie, and holiday crafting I say! With all the great new products being released, I was inspired to bring you a Happy Halloween Party idea. Let's get started.


Here is a list of all the supplies I used for each project:

Trick or Treat bag- Cricut, CTMH Art Philosophy Cricut cartridge, DCWV Bewitched stack, Tim Holtz Seedless Preserves Distress Pad and applicator, sheer plum ribbon, Orange Licorice Trendy Twine, black flower, Crystal stickles, purple gems, foam dots, Fabric Tac, black tissue paper

Cupcake Stand and topper- Lifestyle Crafts Cupcake Stand Die set, Sizzix Big Shot, DCWV Bewitched stack, Tim Holtz Ripe Persimmon Distress Pad and applicator, paper doily, Orange Licorice Trendy Twine, Stampin’ Up postage stamp punch, toothpick, purple gems, Fabric Tac

Spooky Candle- Flameless candle, DCWV Bewitched stack, Tim Holtz Ripe Persimmon Distress Pad and applicator, Stampin’ Up scalloped border punch, Orange Licorice Trendy Twine, Crystal Stickles, purple gems, foam dots, Fabric Tac

Now on to how I did it!


Cut the bag on page 23 of the Art Philosophy Cricut cartridge at Fit to Page size. Fold and glue together to build the bag. Ink all the edges with Tim Holtz Seedless Preserves Distress Pad. Cut the Trick or Treat card from the DCWV Bewitched stack and attach to the front of the bag using foam dots. In the top left corner of the bag attach a double bow made from the sheer plum ribbon, glue black flower in the center of the bow then a glue a double bow made from Orange Licorice Trendy twine under the flower. Adhere purple gems to the other 3 corners of the bag and apply stickles around the trick or treat.


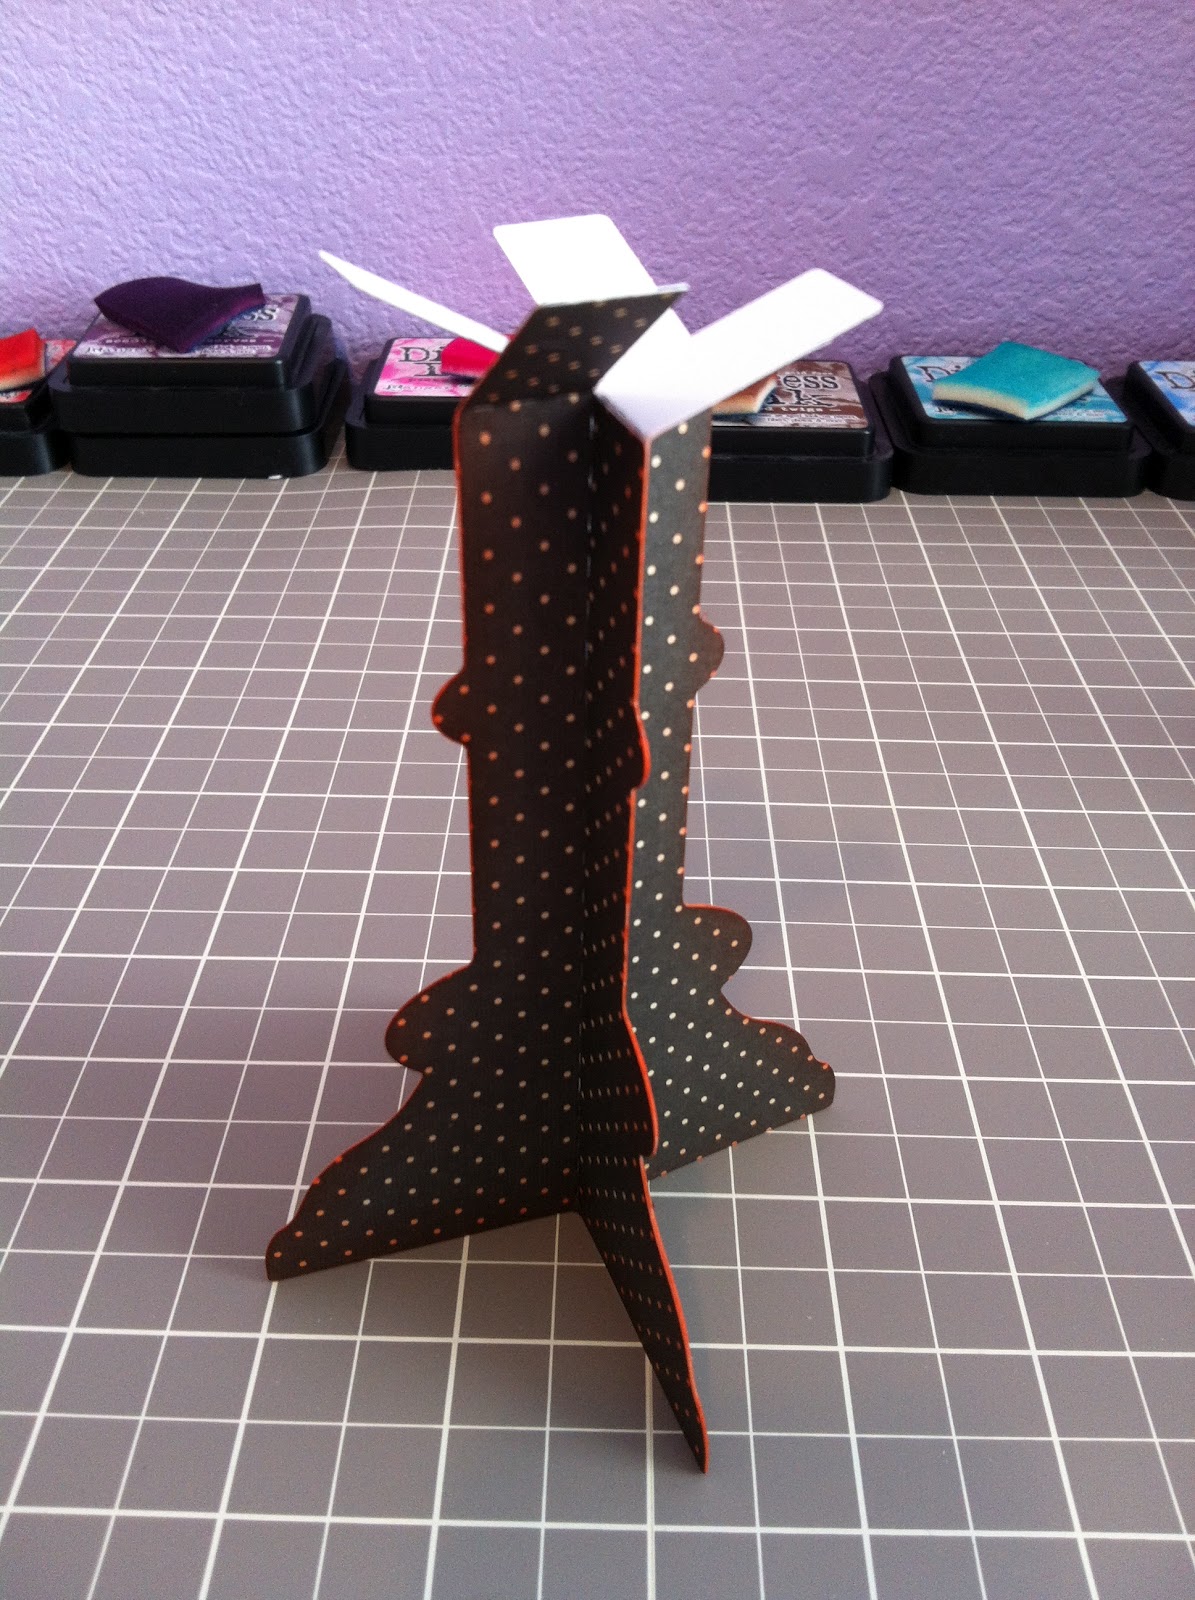
Cut 4 of the stand bases, 1 support circle and 1 scalloped circle top from the Lifestyle Crafts Cupcake Stand die. Ink all the edges with Tim Holtz Ripe Persimmon Distress Pad. Glue the 4 base pieces back to back to create the full base. Glue Orange Licorice Trendy Twine down the base to cover the fold lines. Embellish the edges with purple gems. Glue down support circle then glue scallop circle on top. Weave Orange Licorice Trendy Twine through the paper doily and glue it to the stand top. The topper is made from an owl image punched from the DCWV Bewitched stack using the Stampin’ Up postage stamp punch. Edges are inked with Tim Holtz Seedless Preserves Distress Pad. Purple gems are added for eyes and double Trendy Twine bow is glued to the bottom. Attach to the toothpick.

                                    HERE ARE A FEW PICS SHOWING HOW TO PUT THE STAND TOGETHER


                                                                Last but not least is the Spooky Jack o Lantern candle


Cut a strip of paper from the DCWV Bewitched stack, punch with Stampin’ Up scalloped border punch and ink the edges with Tim Holtz Ripe Persimmon Distress Pad. Add crystal stickle dots between scallops. Glue strip around candle then glue double strand of Orange Licorice Trendy Twine on top. Cut spooky Jack o Lantern tag and attach to candle with foam dots. Embellish tag with purple stones and crystal stickles to the Jack o Lantern face.

Well....there you have it! My Halloween Party projects. I hope you have been inspired to start your Fall crafting. Please follow my blog or you can find me on Facebook and Pinterest. I promise there is a lot more crafty inspiration headed your way if you do!

I want to say a BIG thank you to My Craft Channel for having me guest blog! And thank you all for hopping by. Have a great crafty day!

Kerri


Sunday, August 12, 2012

Denami Design Bright Bold & Beautiful Blog Hop

Hey Crafty Friends-

I am such a Denami Design addict! I am just so excited to be a part of another hop. No chit chat! Lets get to the card.


I started with a craft card base and rounded the corners. I embossed the Teeny Heart Background stamp in white and created the rainbow by using a foam blending tool and Tim Holtz Distress Inks in Picked Raspberry, Peacock Feathers, and Preserves. I just streaked the colors across the card then gently patted with a paper towel to remove the excess ink from the embossing. To create the clouds I used a cupcake punch and punched out the the top of the cupcake in white cardstock, inked the edges in Peacock feathers and went over the edges with diamond stickles. I then used the Upright Happy Birthday stamp and colored each letter individually and stamped the word HAPPY on the clouds. The clouds are layered slightly over each other and popped up on foam dots. Three pink gem stones in the bottom right corner add a little bling. The card is finished off by a double bow of Strawberry Cupcake Trendy Twine.

I am so happy with how this card turned out. This is one where I started off with a different idea of what the card would be and went a totally different direction. Thank you so much for hopping by! Don't forget to hop on over to the next blog on the list


    Kerri Smith http://www.crafttimeandcupcakes.com/    <-------  you are here

                    Deb W. http://mycraftroomcreations.blogspot.com/

If you want to start from the beginning of the list or if you are interested in the Denami stamps you see please visit Denami Design http://www.denami.blogspot.com/

Thursday, August 9, 2012

Core Cards Creative Frenzy

Hey Crafty Friends-

Today I am posting my entry for the Core'dinations Design Team Call. It has been a tough job to choose three of my favorite projects to submit, but I did it and here they are!

                                                                           STRAWBERRY BIRTHDAY CARD


                                                                                SEASONS GREETINGS CARD


                                                                                               BOTTLE TAG


Wish me luck everyone!

Monday, August 6, 2012

Day at the Beach - Krazy for Kraft Trendy Twine

Hey Crafty Friends-

It's time for another craft project with Trendy Twine! The color for August is Krazy for Kraft. The theme is BEACH. I knew immediately what I was going to create with my twine, a net!


I started with a simple wood frame you can get for $1 at Michaels. I painted it with Martha Stewart craft paint that has a pearl sheen. I freehand cut the "sand" at the bottom of the frame and inked the edges. The sand castle, shell, starfish, and seahorse were all cut from the Create a Critter Cricut cartridge. The edges were inked and stickles were added for a little pizazz. To incorporate the monthly challenge into my project I used a toothpick and washi tape to create the flag for my castle.

Now for the focus of my project, the fantastic net!


To create the net I cut 10 pieces of twine at about 12 inches and taped them down to a nonstick craft mat. I then cut 15 pieces of twine also at 12 inches. I started on the bottom, left side and tied each of the 15 pieces to the cross pieces that were taped down. I hope this picture will help explain it. It's not hard to do at all. My kiddos erased the video I had for you so a photo will have to do.


I hope you get the idea. Tie a knot around each of the cross pieces as you move up the grid. Tie a knot on one strand then move up to the next one and tie another knot around that strand. When you're done you will have a fabulous net to drape over your frame. Make sure to snip the ends off !

I hope you will try and make your own Trendy Twine net for your beach project. Don't forget to check out of the August challenge on the Trendy Twine Blog. I will have another great Trendy Twine project for you on August 20th.

Thanks for stopping by and come back soon!


Wednesday, July 18, 2012

Crafty Coffee Weather!

Hey Crafty Friends-

The weather here in Vegas has been crazy! It went from sunny and 116 degrees to cloudy, stormy skies and 86 degrees! So since I work better under pressure of course I waited until this week to get my Berry Red Trendy Twine project done. I was so inspired by our "cold" snap I had to create a cute little card to prove my undying love for a cup of hot COFFEE! 


The base card is craft cardstock cut at 10" x 4" and folded in half. I ran it through the Big Shot using the Swiss Dot Cuttlebug folder and rounded the corners. The edges are inked using Tim Holtz Festive Berries Distress Ink. The coffee mug is DCWV white glitter cardstock cut at 3" from the Love You  a Latte Cricut cartridge. The heart was cut from the same cartridge in red DCWV glitter cardstock at 1.5". Brown cardstock backed the mug to create the coffee. The edges of the mug were lightly inked with Gathered Twigs Distress Ink. The heart and mug were both popped up on foam dots for dimension. The sentiment "Where have you been all my life" from My Creative Time, You Had Me at Chocolate stamp set was stamped in the same Gathered Twigs Distress Ink. A double strand of Berry Red Trendy Twine was wrapped around the bottom of the card, the another double strand  wrapped around the top an tied in a double bow!

I hope you like my simple little card. It made me smile! I'll have more Trendy Twine goodness for you on Monday August 6th. Please come back and check it out!

Visit the Trendy Twine blog at http://trendytwine.blogspot.com/ to get your twine and start crafting!
You still have time to participate in the July Challenge! Details here.

Kerri

Monday, July 16, 2012

Denami Design Blog Hop

Hey Crafty Friends-

I will be participating the in the Denami Design Bright, Bold and Beautiful Blog Hop on August 12th


I hope you'll come back and follow along! Start at the Denami Blog http://www.denami.blogspot.com/

Have a crafty day!

Kerri

Monday, July 2, 2012

Hooray for the Berry Red, White, and Blue!

Hey Crafty Friends-

Well the day has finally come. My first official Trendy Twine Design Team post! This month we are getting in the patriotic spirit with Berry Red twine. With Independence Day just two days away, I whipped up a simple party idea that will impress your BBQ guests. Festive embellished water bottles paired with flag straws are sure to get everyone feeling the love for the U.S.A.


This is so simple to do. Even with two days to go you have plenty of time to get them done. I purchased a huge roll of the red & white checked ribbon at Costco for around $7. I pulled the label off of the bottle then wrapped the ribbon around to check the size and cut the appropriate length. I used my ATG gun to attach it to the bottle. I tied Berry Red Trendy Twine around the top and bottom of the bottle to jazz it up even more.


The scalloped circles were cut using Lifestyle Crafts dies, but to do in mass I think I would use the Cricut or Silhouette to cut as many as you need. The large scallop cut from blue cardstock and inked with white pigment ink is approx 2.25" and the craft cardstock scallop inked in red and stickles added is approx 1.75". The Berry Red twine was wrapped around the smaller scallop three times and glued in place. A red button, a bow tied in Berry Red and Blue Berry layered on top of the button and a little bling in the center of the bow. The scalloped circles were layered using foam dots for dimension.


The straw flag is even quicker and easier. It too is cut from a Lifestyle Crafts die but you can easily cut a rectangle, make a V cut at the end, and cut slits for the straw to fit through to create your own. I inked the edges in blue distress ink, stamped the sentiment in red, added blue gems, and finished it with a Berry Red twine bow.

These projects were so fun to make. I hope you will give them a try for your 4th of July Celebration!